Easy Html Tutorials

Stats

/

Notifs

Complete blog makeover (1/22/2014) Send me your thoughts!

The results are in! Look here to see the survey responses.

NETWORKS

Support Me
Support easy-html-tutorials! If you enjoy my tutorials, consider adding one of the following to your blog!

Easy Html Tutorials
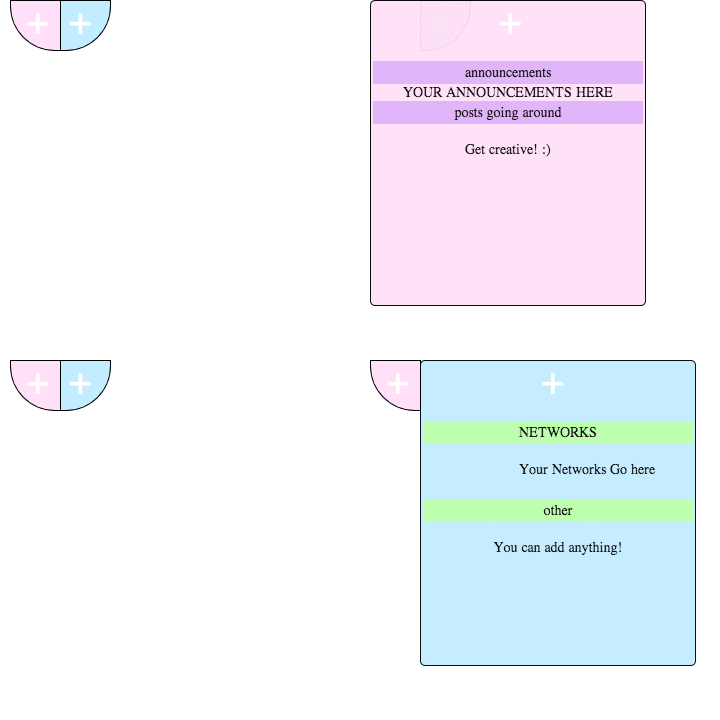
Double Bubble Tab, From top!

Preview: (Live Preview)
image

1. Start off by finding </style> and copy and paste this code directly before it. (You can also past it directly after <style type=”text/ccs”> if you cant find </style>)

2. Then find <body> in your theme, and paste this code right after it. You can also paste it right before </body>

3. Customize to your hearts desire! Everything is labeled in the html. You can change the color, add all your announcements and networks, you can change the width and height of the tabs. Almost anything is possible!!! If you have any questions feel free to ask! 

Code written by me (dazieh

Please look here before asking questions about this tutorial!

*Like this tutorial if you found this helpful or are using this code!*

Sunday, July 21, 2013
Slide From Left Updates/Networks Tab

easy-html-tutorials:

Here is how the tab will look on your blog:

image

Here is how to install the hover tab on your blog:

  1. First, find </style> in your theme. An easy way to do this is by pressing Ctrl+F and typing </style>.
  2. Once you find that, paste this code directly above it. If you cant find <style>, just paste it after <style> or <style type=”text/css”>.
  3. Next, you need to find <body> or </body>
  4. Once you have found that, paste this code either after <body> or before </body>

Now to customize your hover tab!

  1. Replace “SLIDE TITLE” with what you would like your tab to say. (ex: HOVER) You can also use some cute text symbols from here!
  2. Then replace “SLIDE TEXT GOES IN HERE (NETWORKS/UPDATES/WHATEVER YOU WANT)” with what you would want to say in your tab! Use the tag <br> to create a new line within the text! 


* Like this post if you found it helpful! *


(Source: easy-html-tutorials)

Sunday, July 14, 2013
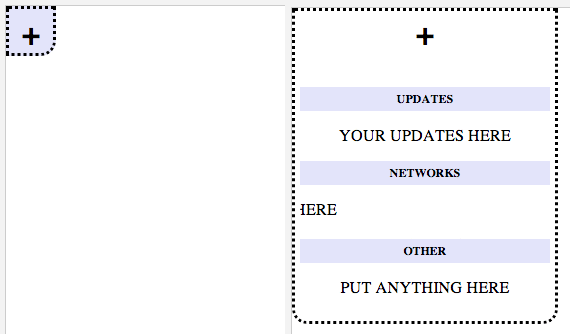
Bubble tab with dotted borders

PREVIEW: 

Paste this code under

<style type="text/css">

or before

</style>
  1. If you do not want dotted borders, find “border:dotted;” and change it to solid, or, if you don’t want a border, remove the line of the code. 
  2. To change your box color, find the code under
    .ttitle { 
    and change it to any color that you would like
  3. To change height of box that the icon is in, find
    #tabs{ 
    and change the width/height
  4. To change height of hover box, find
    #tabs.hover{
    and change height/width

Now paste this code under <body>

  1. To make the icon a different one, remove the plus and use 
    <img src="URL">
    (retype quotation marks) 
  2. To make the dividers another color find background and change the HTML color. 
  3. Marquee is already installed for networks

Please look here before asking questions about this tutorial!

Credit goes to html-tutorials

Sunday, July 14, 2013
Advanced Customization For the Slide from left Updates/Networks Tab!

To add a border around the inner part:

  • Go to the section of your code: #oneout_inner
  • At the bottom of that section of html, add this code. (before the } mark)
  • Change the word “dashed” to “solid” or “dotted” to change the style of the border.
  • Change the 1px to any number of px to increase the thickness of the border.
  • Change “#000000” to any color code from here to change the color of the border. 

To change font of the Title of the Hover tab (ex: HOVER) 

  • Find .onetitle in your html. 
  • Find where it says: font-family:arial;
  • Replace the name of the font “arial” with either the font on your blog or a custom font. 

To change the font inside the hover tab: 

  • Find #oneout_inner
  • Add font-family: and the name of the font you want to that section of coding. 

*LIKE THIS POST IF YOU FOUND IT HELPFUL*

Saturday, July 13, 2013
Slide From Left Updates/Networks Tab

Here is how the tab will look on your blog:

image

For a live preview, go to my (Megan) main blog here and look on the left!

Here is how to install the hover tab on your blog:

  1. First, find </style> in your theme. An easy way to do this is by pressing Ctrl+F and typing </style>.
  2. Once you find that, paste this code directly above it. If you cant find <style>, just paste it after <style> or <style type=”text/css”>.
  3. Next, you need to find <body> or </body>
  4. Once you have found that, paste this code either after <body> or before </body>

Now to customize your hover tab!

  1. Replace “SLIDE TITLE” with what you would like your tab to say. (ex: HOVER) You can also use some cute text symbols from here!
  2. Then replace “SLIDE TEXT GOES IN HERE (NETWORKS/UPDATES/WHATEVER YOU WANT)” with what you would want to say in your tab! Use the tag <br> to create a new line within the text! 


* Like this post if you found it helpful! *


Friday, July 12, 2013