


Cute hover tab!


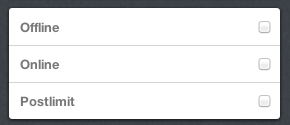
Online/Offline/Post Limit Status
Paste this following code after <head> (where the meta codes are, they all look very similar.
Then paste the following code in your hover tab, or wherever you want it to show up!
{block:ifOnline}☑ Online ☐Offline ☐Post Limit<br>{/block:ifOnline} {block:ifOffline}☐Online ☑ Offline ☐Post Limit<br>{/block:ifOffline} {block:ifPostlimit}☐Online ☐Offline ☑Post Limit<br>{/block:ifpostlimit}
Save and close your customize page. To change the status, go into your main customize page and check the appropriate box!
SCM Music Player (with custom skin)
- Go to the website playlist.me, and click the tab that says “Skins” at the top of the page.
- Scroll through until you find the skin you want, and select it (by clicking the little bubble to the right)
- Now click the “Player” tab at the top of the page, and click “next”
- On the “playlist” tab, fill in all the songs you want in your playlist. (use youtube) then click next again.
- Make the settings the way you want it to look, there should be a preview of it on the page. Then click done.
- Copy the entire code that is shown and paste it into your html under the <body> tag or before the </body> tag.
Now you are done! *note: the player won’t show up in your theme preview*
*PLEASE LIKE THIS TUTORIAL IF THIS WAS HELPFUL!*
Adding network icons to your hover tab:
If the hover tab doesn’t already have it, add <marquee> NETWORK ICONS GO HERE </marquee> to the part of the hover tab where you want your icons to go.
For example, if I wanted to add this image: ![]() to my hover tab, I would right click the image and choose “Copy img url” and add the url as an image in html, like this: <img src=”url of the image”> to my hover tab.
to my hover tab, I would right click the image and choose “Copy img url” and add the url as an image in html, like this: <img src=”url of the image”> to my hover tab.
To link it to a network page, you would use <a href=”url of the network”> <img src=”url of the image”> </a>
And that’s it!
Adding a chat box!
Super easy guys, All you have to do is sign up and create your chat box at http://www.cbox.ws/
Then it’ll give you html for you to add to your blog, and the easiest place to put it is in your hover tab! Just change the width/height to the desired amounts :)
Creative & Unique codes for your blog!
Add any of the following codes to the very bottom of your theme code. After </html>
Adding Backgrounds to a Pop Up
*This tutorial is for use with this Pop Up tutorial
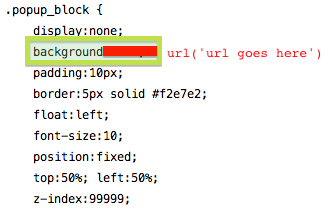
To have a background inside your pop up window (Live Preview), find .popup_block in your html code. Look for background:#fff; delete it and add: background-image:url(‘url of the image’);
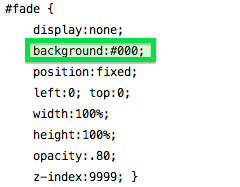
To change the background behind a pop up box (Live Preview), find #fade in your html code, and then look for background:#000; delete that section of the code and replace it with: background-image:url(‘url of the image’);
Update the preview before you save to make sure it looks the way you want!
Please *Like* this tutorial if you found it helpful!
Falling Hearts!
Paste this code after <head> or before </head>
Note: The hearts will not show up on the customize page, you must click update preview, then save and close.
*Like this tutorial if you found it helpful/are using this code!*
Also, If you would like a customized falling images code, message me!
Double Bubble Tab, From top!
Preview: (Live Preview)
1. Start off by finding </style> and copy and paste this code directly before it. (You can also past it directly after <style type=”text/ccs”> if you cant find </style>)
2. Then find <body> in your theme, and paste this code right after it. You can also paste it right before </body>
3. Customize to your hearts desire! Everything is labeled in the html. You can change the color, add all your announcements and networks, you can change the width and height of the tabs. Almost anything is possible!!! If you have any questions feel free to ask!
Code written by me (dazieh)
Please look here before asking questions about this tutorial!
*Like this tutorial if you found this helpful or are using this code!*
Falling Bubbles!
Paste this code after <head> or before </head>
Note: the bubbles won’t show up on the customize page, you have to click save and then close the customize page to see the bubbles!
Double Bubble Tab!
Preview: (Live Preview)
1. Start off by finding </style> and copy and paste this code directly before it. (You can also past it directly after <style type=”text/ccs”> if you cant find </style>)
2. Then find <body> in your theme, and paste this code right after it. You can also paste it right before </body>
3. Customize to your hearts desire! Everything is labeled in the html. You can change the color, add all your announcements and networks, you can change the width and height of the tabs. Almost anything is possible!!! If you have any questions feel free to ask!
Code written by me (dazieh)
Please look here before asking questions about this tutorial!
*Like this tutorial if you found this helpful or are using this code!*
Making Network Icons all the Same Size!
There are a lot of tutorials on this but some of them don’t work, this one actually works! Add the following code after the url of the image:
style='height: 75px; z-index: 1;'
It should end up looking something like this:

Just change the number 75 to any other number to make the image bigger or smaller!
Please *LIKE* this tutorial if you found it helpful!
Glitter Borders for Bubble Tab
Paste this code under #tabs:hover{ in your bubble tab code. If you don’t have a bubble tab yet, check out this tutorial or this tutorial!
OPTIONAL:
- Change border:4px; to a bigger or smaller number to change the size of the borders.
- Change All of the URLS in the code (highlighted in the image below) to a different url from THIS website!

- Make sure you change all of the URLS or it will not work!!
Please *LIKE* this tutorial if you found it helpful!
Post border on Narnia
Add this to your image code or image hover code
border: 2px dashed #ffffff;
Change the pixels to desired width, dashed to dotted/solid/ect, and #ffffff to your HTML color code